|
1/30/2023 0 Comments Why Is My Drywall Mud Not Drying
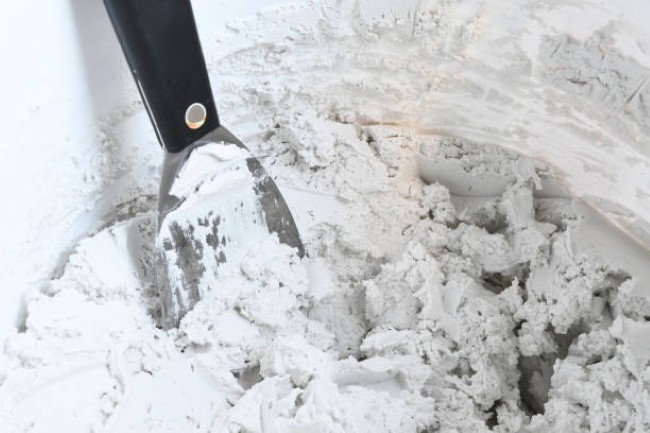
Are you struggling to get your drywall mud to dry? If so, you’re not alone. Many people face this frustrating problem, but don’t worry; you can take a few simple steps to dry your mud quickly and effectively. In this article, we’ll look at why your drywall mud might not be drying and give you some tips for speeding up the process. Keep reading to learn more about what might be causing your mud to stay wet and how you can ensure it dries as quickly as possible. Reasons Why Drywall Mud is Not Drying
Drywall mud, or joint compound, is essential for creating strong and aesthetically pleasing walls. Unfortunately, a common problem plagues homeowners when using drywall mud, it will not dry. Let's explore the reasons why drywall mud may not dry properly here. 1. Lack of VentilationOne primary reason for damp drywall is a lack of ventilation. If the area being worked on has no proper air circulation or ventilation, the humidity levels in the room will be too high for the mud to dry out properly. This can also happen if the room is too small with no windows or opening to let fresh air in. In these cases, the best solution is to increase airflow by opening windows and doors or installing a fan to help circulate air throughout the space. 2. Improper ApplicationAnother common reason why drywall mud might not be drying is improper application. Applying too thin of a layer of joint compound over your patchwork can cause problems when it comes time to sand down the wall. The key here is to apply several thin layers of joint compound rather than one thick layer, as this will give you better results when sanding and make it easier for your joint compound to dry correctly. 3. Temperature IssuesTemperature can affect how quickly mud dries as well. If your work area is too cold, it could take longer for the joint compound to set up correctly. Likewise, if it's too hot, it could cause some bubbling or cracking due to moisture evaporating from your patches too quickly. Check what temperature range is ideal for your project before starting any work to ensure that your joints will be set up correctly every time. 4. Incorrect Type of Compound UsedFinally, sometimes it can simply be down to using the wrong type of joint compound for a specific job. Different types of compounds are designed for different purposes and should be used accordingly; if you use one that isn't suited for your job, it may take longer than expected to fully set up and cure correctly, resulting in poor results overall. Be sure you know which compound works best before beginning any project. This way, you won't have any surprises later on down the line. Ways to Make Sure Your Drywall Mud Dries Quickly and EffectivelyWhen it comes to completing a drywall project, speed and effectiveness are paramount. Ensuring that the drywall mud dries quickly is essential for saving time and producing a high-quality finish. To ensure the best results for your drywall project, we will examine how to dry drywall mud quickly. A. Using Quality Joint CompoundWhen doing a drywall project, it is important to use quality joint compounds. Poor-quality joint compounds are more difficult to work with and may take more time to dry than their higher-quality counterparts. To ensure quick drying times, it is always advisable to buy a good-quality joint compound. Additionally, if you choose a powder joint compound instead of ready-mixed, it should be adequately mixed according to the manufacturer's instructions for optimal results. B. Applying Thin Coats of MudAnother critical factor in getting your mud to dry quickly is to apply thin layers rather than thick ones. Thick coats of mud take much longer to dry than thinner coats, so it’s always best practice to apply thin coats when possible. It can also be helpful in this regard if you use a taping knife or another narrow tool for applying the mud instead of a wide putty knife which can result in thicker layers of mud being applied. C. Using Suitable TemperaturesIn addition to using high-quality materials and applying thin layers, suitable temperatures must also be considered when looking at ways to get the mud to dry efficiently and effectively. Not only should the temperature of the air be considered, but also that of the surfaces on which you are working. If possible, try not to work on very cold days since cold surfaces will slow the drying process; instead, opt for warmer days whenever possible since warm surfaces will help speed up drying times significantly. Additionally, try not to provide too much airflow while working since this can cause uneven drying and possibly even cracking or bubbling your finished product once it has dried completely. ConclusionNo one likes dealing with wet and clumpy drywall mud, so the patchwork must dry quickly. By understanding the common causes of why drywall mud doesn't dry and following these simple tips, you can complete your project in no time. Remember that proper ventilation, temperature control, and quality materials are critical factors in achieving complete dries, so make sure that you don't overlook these important details.
0 Comments
Are you considering washing drywall mud down the sink? Drywall mud, also known as joint compound, is a crucial material for many home improvement projects. But before you do so, it is essential to know this action's risks and potential consequences. In this blog post, we’ll discuss the dangers of washing drywall mud in the sink, so you can make an informed decision on how to dispose of it. Potential Dangers for Washing Drywall Mud Down the Sink
Drywall mud is used for finishing and repairing drywall surfaces. It can be a messy job, and some people might be tempted to wash the mud down the sink. However, this practice can lead to potential dangers that must be addressed. Clogs and Blockages in PipelinesWhen washed down the drain, drywall mud can lead to clogs and blockages in pipelines due to its thick consistency. If it is allowed to accumulate over time, it can cause severe damage by creating obstructions or even complete blockages of water pipes, as well as sewer lines and drains. Clogs are also a common issue when drywall mud washes into septic tanks or sewage systems, as these waste management systems are not designed to handle such materials. Furthermore, if a clog occurs in your home’s plumbing system, it could result in costly repairs since most plumbing services cannot remove the hardened concrete-like substance created from dried-out drywall mud. Damage to Septic Tanks and Sewer SystemsNot only can clogging occur from washing drywall mud down the sink, but also septic tank and sewer damage due to mineral buildup from the limestone found within the mud mixture. This is another concern associated with using drywall mud as a sink cleaner, as it will eventually cause corrosion in wastewater management systems which would require costly repairs or replacements for remediation purposes. In addition, large chunks of the material may form over time that cannot pass through the pipes without causing further blockages or damages both of which ultimately cost money for homeowners attempting to remedy their problems on their own accord; Or through hiring professionals who have access to specialized equipment capable of removing such material safely and efficiently without damaging your plumbing infrastructure further. Environmental Impact of Disposing of Drywall Mud this WayFinally, it’s essential to consider the environmental impact associated with this method of disposal of drywall mud, as its contents are neither biodegradable nor able to be broken down naturally by aerobic bacteria found within sewage treatment plants meaning that any material washed away are likely going straight into rivers. Lakes or oceans where it will remain indefinitely until removed manually by humans or natural processes like erosion over an incredibly long period (if at all). Besides this obvious pollution problem resulting from washing away drywall mud down sinks or toilets, there is also an additional impact associated with nutrients leaching into bodies of water which may lead to algae blooms during summer months when temperatures rise drastically; Something that can cause massive fish die-offs due excess nutrient levels increasing oxygen deprivation within aquatic ecosystems across various regions around the world ultimately highlighting how such careless disposal practices should always be avoided when possible! Proper Disposal Options for Drywall MudWhen it comes to drywall mud disposal, there are several options available to meet local regulations and environmental standards. Municipal Waste Collection SitesMany cities provide municipal waste collection sites specifically for materials such as drywall mud. At these sites, individuals can bring their drywall mud for safe disposal at no cost. Waste collection sites accept the entire waste stream associated with drywall mud removal projects, including packaging materials, scrap wood, and other debris packaged in properly sealed containers. Waste must be separated into different categories so that it can be recycled or disposed of correctly and safely. Construction Material Recycling CentersIn addition to recycling centers for municipal waste, many areas have facilities that accept drywall mud for reuse and recycling purposes. These centers typically accept all types of drywall-related material, including plasterboard scraps and cut-outs, used joint compound buckets, sealing tape rolls, and more. The center will typically process the material based on its composition (i.e., gypsum), then separate it into usable material (for reuse) and non-usable material (for disposal). Many centers offer special discounts or incentives for individuals who recycle their drywall materials responsibly instead of disposing of them improperly. Local Hazardous Waste Disposal CentersSpecific components within the drywall mud may be hazardous and require special disposal precautions due to their potential to cause health or environmental issues when released into the environment. For example, lead-based paint may be present in older homes with very old plasterboard walls; in this case, the proper way to dispose of the old plasterboard would be through a hazardous waste recycling center rather than a municipal waste collection site or construction material recycling center (which are not equipped to handle hazardous materials). As with all hazardous wastes, proper safety measures must always be taken when handling such materials during any required transportation steps before final disposal at a licensed treatment facility. ConclusionAll in all, flushing down the sink with drywall mud is not recommended because it can cause build-up or clogging in your pipes over time. Instead, if you need to remove excess drywall mud from your home improvement projects, use a dustpan or other container to collect and dispose of the waste properly. Furthermore, regular maintenance, such as using drain cleaners and pull traps regularly, can help prevent any potential issues with your drains due to washing drywall mud down them. With some precautions taken into account, you can safely enjoy your newly improved space without worrying about any potential plumbing disasters.
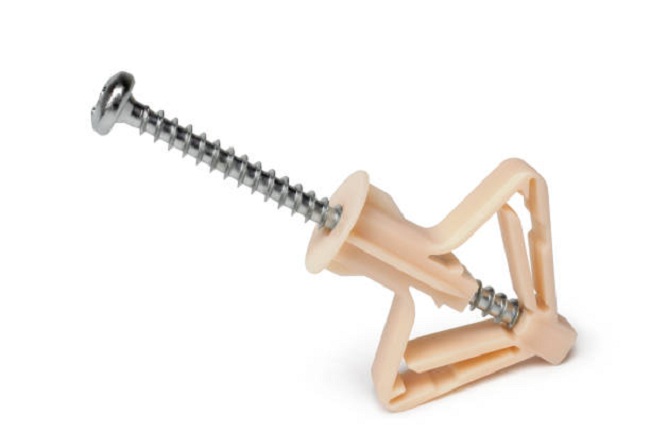
Are you looking for the answers to why your drywall anchors are breaking? It can be disheartening to put a lot of time and effort into installing wall fixtures only to have the anchor fail due to an undetected problem. There are several common causes behind anchors breaking, and understanding these reasons may help you prevent future problems with your wall fixtures. Read on to learn more about the various reasons why drywall anchors sometimes break, from improper installation techniques to faulty materials. Definition of Drywall AnchorA drywall anchor, also known as a wall plug, is a device that secures objects directly into drywall. It consists of two parts: an anchor, which is inserted into the wall, and a screw that goes through it to hold the object in place. The anchors are designed to expand in the wall when the screw is inserted, providing a stronghold. Reasons Why Drywall Anchors Break
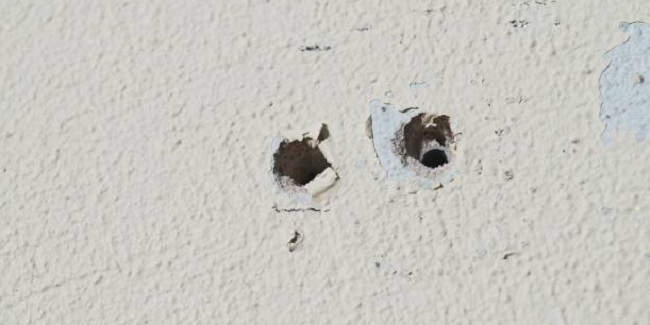
Drywall anchors are a common way to secure objects to drywall. However, there are times when these anchors fail and cause damage to the wall or other objects nearby. A drywall anchor's failure can vary, but it is often due to mechanical damage, environmental factors, design defects, or installation errors. In this paper, we will look at each of these reasons in detail and discuss the implications of their failure. 1. Mechanical DamageOne of the most common causes of drywall anchor breakage is mechanical damage when over-tightened or installed in weak material. When screws become too tight, they can strip the hole in the wall, weakening its structure and leading to an anchor failure. Similarly, if the material being used for the anchors is not strong enough to withstand the force being applied during installation, then it can also lead to breakage. In both cases, it is important to ensure that all materials involved in Anchor installation are properly prepared and have adequate strength before proceeding. 2. Environmental Factors
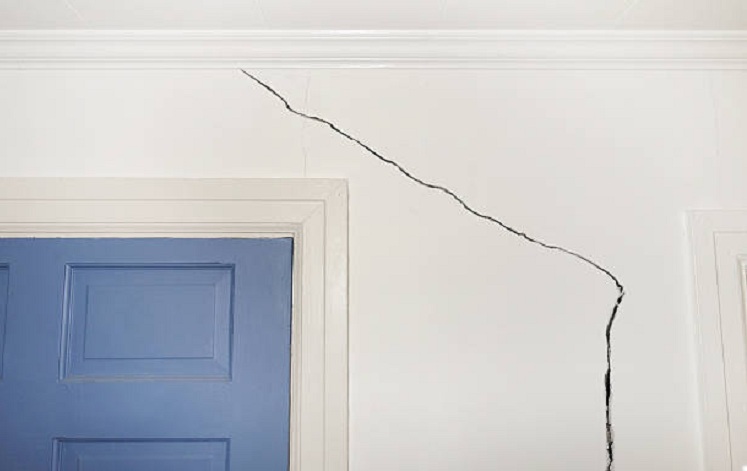
Another cause of anchor breakage can be environmental factors such as moisture exposure or temperature fluctuations. Moisture can enter into walls over time if there are cracks in their surface and weaken them from within, causing them to eventually collapse or crack under pressure resulting in broken drywall anchors. Temperature fluctuations also play a role in causing drywall anchors to fail; as temperatures drop and expand during cold weather months, they may become loose and unable to hold up objects securely, leading them toward failure as well. 3. Design DefectsSometimes even with proper care taken while installing the anchors, they may still fail due to design defects such as poor quality materials or manufacturing errors/deficiencies. As a result, materials that is not strong enough for their intended use or has miscalculations when manufacturing, which leave sections of an anchor weak and prone to breaking under pressure when used for its intended purpose. It is always important for manufacturers and installers alike to thoroughly evaluate all materials involved to make sure that no weak spots exist before use which could potentially lead to failure down the line. 4. Installation ErrorsFinally, another big cause of drywall anchor failures comes from incorrect installation techniques such as the wrong selection of wall anchors or improperly placed holes/pilot holes in drywall, amongst other things, which lead them towards premature breakdowns due to their inability able hold onto objects correctly owing these errors. It is always advisable for installers to maintain high-quality standards during every installation process by ensuring the correct selection of material used for anchoring along with precise pilot hole placements so that new anchor installations do not face problems later on down the line like breakage under pressure, etcetera. ConclusionNow that we have covered the reasons for drywall anchors breaking, it is clear there are multiple potential causes. If you are experiencing anchor failure, it’s important to identify the root cause and take appropriate precautions to ensure that your anchors don’t fail again. This could include using more heavy-duty anchors for additional weight support, ensuring screws are installed securely and at an appropriate depth, or even opting for other wall attachment methods if necessary. With the proper preparation and precautions, you can ensure that your drywall anchors stay secure for years.
Mold and mildew growth in drywall mud can be an unsightly problem, but the good news is that it is preventable. Taking the proper precautions before and after it has dried can reduce the chances of mold growing on your walls and ceilings. This blog post will discuss how to properly apply drywall mud to prevent mold from growing and the steps you can take once the mud has been applied. Read on to learn more about how you can avoid a moldy mess and keep your drywall mud in good condition. Applying Drywall Mud to Prevent Mold
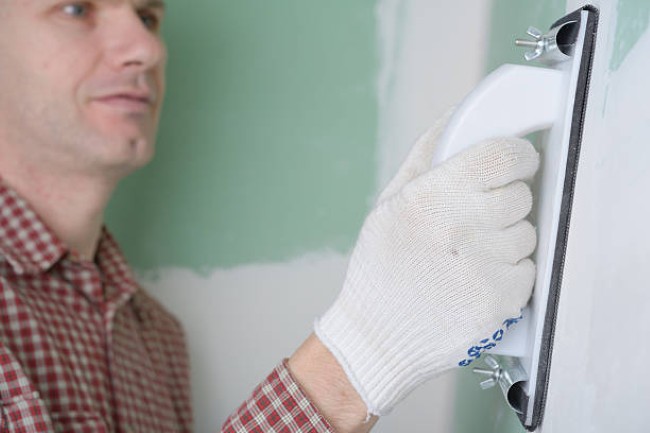
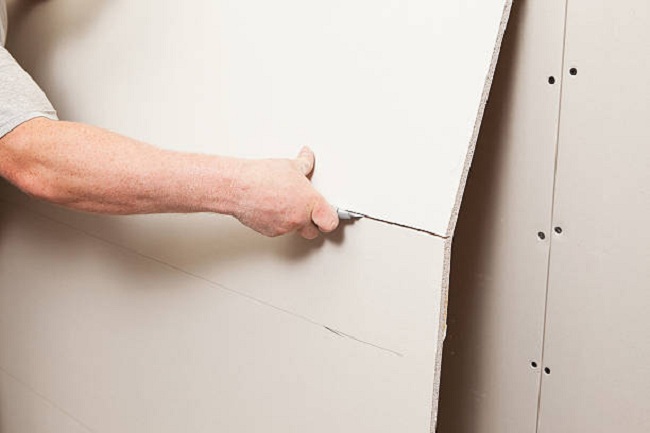
Applying drywall mud correctly is essential in creating a healthy, mold-free home. Drywall mud acts as a barrier against moisture and helps to keep mold growth at bay. Here, we will discuss the steps on how to drywall mud adequately protects your home from mold. STEP 01. Ensure That the Area Is Clean and Free Of Dust, Dirt, and MoistureBefore beginning any work on installing drywall or applying drywall mud, it is important to ensure that the space is free from dust and dirt particles. This can be done by vacuuming or wiping down all surfaces with a damp cloth or vacuum attachment. It is also crucial to ensure there are no leaks or signs of moisture, as these can cause problems with drywall installation and invite mold growth. If there are signs of moisture present, then these should be addressed during installation or applying the drywall mud. STEP 02. Mix the Right Ratio of Water and Drywall Mud for the Best ResultsWhen mixing up your batch of mud, ensure you get a good mix right. Too much water in your mix will make it too thin, while too little makes it thick and difficult to work with. Generally speaking, one part water should be mixed with three parts drywall mix, but this ratio may change depending on what type of project you are working on. Also, consider that thicker mixes tend to have better adhesion but are more challenging to apply evenly, so adjust your ratios accordingly. STEP 03. Never Skip Priming the Wall before Applying Drywall MudYou mustn’t skip out on applying primer before application of the drywall mud if you want long-lasting results and mold to not grow in your walls due to trapped moisture present within them. Priming helps create an even surface for application and provides an additional layer of protection from moisture penetration into the wall cavity, which can lead to mold growth behind your walls if left unchecked over time. When selecting a primer, ensure it’s appropriate for use on interior surfaces such as gypsum boards and has excellent water-resistant properties. STEP 04. Use a Putty Knife or Trowel for Application for Even Coverage
For best results when applying the wet layer of drywall mud; using a putty knife or trowel is recommended since they both have flat edges which allow for even coverage across vast areas without leaving lumps or dips behind after each pass. Start by applying pressure along one side of your chosen tool, then gradually move outward towards other sides until full coverage has been achieved. Don't worry if some corners look uneven since these can be easily smoothed over later with sandpaper once everything has dried up. STEP 05. Allow Sufficient Drying Time before Adding Additional Layers of Drywall MudIt's important not to rush into adding additional layers onto existing ones before their predecessor has had enough time to set otherwise fully; air bubbles might form underneath, causing bumps within your finished surface. Depending on factors such as how humid any given environment is; drying times may vary anywhere from 12 hours minimum up to 24 hours maximum, so always check back regularly just in case additional waiting time needs to be added to maintain quality levels. STEP 06. Use Sandpaper to Achieve a Smooth Finish after Layer Has Dried Once all layers have completely dried up, give them one last check-up using sandpaper to achieve smooth surface texture overall; starting with rougher grits first, then gradually transitioning into finer ones until the desired level has been reached without damaging newly applied material underneath. Keep frequently turning over different pieces throughout the entire process just in case some particularly rough spots remain hidden beneath earlier stages; adjusting pressure levels accordingly depending upon how thick each respective layer happens to turn out at the result stage. Mold Prevention When Drywall Mud Has Already Been AppliedIf you already have drywall mud applied, several things can be done to help prevent mold growth. First, make sure to ventilate the area adequately. When using water-based mudding, adequate ventilation is essential to allow the moisture from the wall to evaporate. This can be achieved by opening windows or running a dehumidifier in the room. Furthermore, all wet areas are sealed properly with primer and paint. Primer helps seal any moisture and prevents it from seeping into other areas of drywall mud, thus stopping mold spores from growing. After painting, use an air freshener or scrub brush to remove any remaining dust or residue on the walls. It is also a good idea to inspect the drywall mud periodically for signs of mold growth. If any is found, make sure to clean it up immediately and treat the area with a fungicide or mildew ide. Doing so will help prevent further mold growth and keep the area safe. Finally, use fans and other ventilation sources to circulate air around the room and reduce moisture levels to prevent mold from growing on walls with drywall mud applied. This helps to keep your drywall intact and free from mold! ConclusionFollowing these simple steps, you can ensure that your newly applied drywall mud stays in pristine condition for years and does not succumb to mold or other moisture-related issues. Regularly checking for cracks and gaps in the walls is essential, as well as ensuring adequate ventilation in the room. Applying the correct type of drywall mud, cleaning off any excess material, and applying a sealant after drying are all important measures you should take when working with this material. Doing so will ensure that your drywall remains clean and beautiful over time. |